段落書式は、段落のインデントや行端揃えなどの段落に適用されるプロパティを設定するために使われます。段落の最も一般的な内容はテキストであることから、段落内で文字オプションを設定することもできます。この場合、設定は段落内のすべてのテキストに適用されることになります。ただし、文字書式で段落オプションを設定することはできません。そのような設定を実行するとエラーが発生します。
このセクションでは、使用可能な段落オプションを一覧して説明します。これらは任意の段落書式で設定できます。前述のとおり、
コア 段落書式は
{paragraph ...} になります。段落オプションを明示的に設定せずにこれを使用すると、オプションは既定値を取ります。次の表ではこれらの既定値を示します。
段落オプションはすべてローカル オプションです。つまり、段落を他の段落にネストした場合、または
Graphic に段落を配置した場合、コンテナで設定される段落オプションは中にある段落に
適用されません 。
これが必要なのは、段落オプションにより段落内容の整列やインデントが変わるためです。段落は他の段落に埋め込まれることが多く、インデント関連のオプションでは相対的な値が指定されます。したがって、ローカルの段落オプションでは予測せぬ結果を生成する可能性が低くなるわけです。
|
|
|
|
|
|---|
| paragraph-left-indent | 0pt | 段落の左端と、そのコンテナの左端の間の距離を指定します。
コンテナは、グラフィカル オブジェクトまたは他の段落です。 | 任意の距離値 |
| paragraph-right-indent | 0pt | 段落の右端と、そのコンテナの右端の間の距離を指定します。 | 任意の距離値 |
paragraph-first-
line-offset | 0pt | 段落の左端から 1 行目をインデントする量。左端は paragraph-left-indent で定義されます。正の値は 1 行目が左端の右側にある位置から始まることを示します。負の値は左端の左側にある位置から始まることを示します。 | 任意の距離値 |
| paragraph-justify | "left" | 段落の配置。 | 次の 1 つを指定します。 |
| | | 段落の左端をコンテナの左端に揃えます。 | |
| | | コンテナ内で段落を中央に揃えます。 | |
| | | 段落の右端をコンテナの右端に揃えます。 | |
| paragraph-line-spacing | 0pt | 行の間隔。 | 任意の距離値 |
| paragraph-before-spacing | 0.6em | 段落前の間隔。 | 任意の距離値 |
| paragraph-after-spacing | 0.6em | 段落後の間隔。 | 任意の距離値 |
次の例では、段落のインデント オプションの効果を示しています。
注意: paragraph-first-line-offset オプションでは段落の左端からの間隔を相対的に指定します。左端の位置は paragraph-left-indent オプションで定義します。
| 例:
段落のインデント オプション |
 |
{Frame
    background = "pink",
    {paragraph
        paragraph-first-line-offset = 0.25in,
        This paragraph's container is a Frame. Since this
        paragraph's left indent is not set, the default, 0, takes
        effect, which aligns it with the Frame's left edge.
        Hence the first line offset is 0.25in to the right of
        the pink edge.
        {paragraph
            paragraph-left-indent = 0.25in,
            paragraph-first-line-offset = 0.25in,
            This paragraph is nested in the previous paragraph, so the
            left indent setting is relative
            to the previous paragraph's left edge, which happens to be
            the same as the Frame's left edge. And its first line offset
            is, in turn, relative to it. }
        {paragraph
            paragraph-left-indent = 0.25in,
            paragraph-first-line-offset = -0.25in,
            About this paragraph: This paragraph is a sibling of the
            previous one.
            Its left indent is the same as its sibling, but its first
            line offset setting is a negative value, which means that
            the first line is offset to the left of this paragraph's left
            edge. See the effect?}
        {paragraph
            paragraph-justify = "right",
            paragraph-right-indent = 0in,
            This paragraph is right aligned but has no right indent.
        }
        {paragraph
            paragraph-justify = "right",
            paragraph-right-indent = .25in,
            This paragraph is right aligned and has a right indent.
        }
    }
}
| |
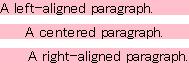
次のボックスには、左揃え、中央揃え、右揃えのテキストがあります。
| 例:
paragraph-justifyを使用しての段落の行端揃え |
 |
{TextFlowBox
    width = 5cm,
    background = "pink",
    {paragraph
        paragraph-justify = "left",
        A left-aligned paragraph.
    }
}

{TextFlowBox
    width = 5cm,
    background = "pink",
    {paragraph
        paragraph-justify = "center",
        A centered paragraph.
    }
}

{TextFlowBox
    width = 5cm,
    background = "pink",
    {paragraph
        paragraph-justify = "right",
        A right-aligned paragraph.
    }
}
| |
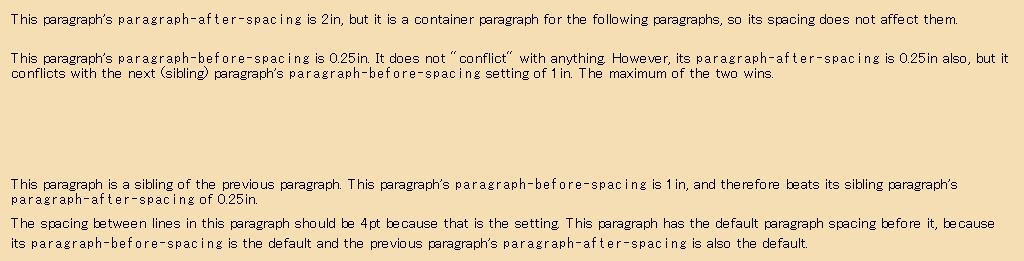
次の例では、間隔オプションを段落の前後に適用した効果を示しています。ここでは段落間の間隔を指定しています。間隔の設定の競合を考慮して、最大幅の間隔を使用しています。
| 例:
段落の間隔オプション |
 |
{Frame
    background = "wheat",
    margin = 8pt,

    {paragraph
        paragraph-after-spacing = 2in,

        This paragraph's {monospace paragraph-after-spacing} is
        2in, but it is a container paragraph for the following
        paragraphs, so its spacing does not affect them.

        {paragraph
            paragraph-before-spacing = 0.25in,
            paragraph-after-spacing = 0.25in,

            This paragraph's {monospace paragraph-before-spacing}
            is 0.25in.  It does not "conflict" with anything.
            However, its {monospace paragraph-after-spacing} is
            0.25in also, but it conflicts with the next (sibling)
            paragraph's {monospace paragraph-before-spacing}
            setting of 1in. The maximum of the two wins.
        }
        {paragraph
            paragraph-before-spacing = 1in,

            This paragraph is a sibling of the previous paragraph.
            This paragraph's {monospace paragraph-before-spacing}
            is 1in, and therefore beats its sibling paragraph's
            {monospace paragraph-after-spacing} of 0.25in.

        }
        {paragraph
            paragraph-line-spacing = 4pt,

            The spacing between lines in this paragraph should be
            4pt because that is the setting.  This paragraph has
            the default paragraph spacing before it, because its
            {monospace paragraph-before-spacing} is the default
            and the previous paragraph's {monospace
            paragraph-after-spacing} is also the default.
        }
    }
}
| |
定義済みの文字書式と同様に、定義済みの段落書式を使用して、オプションを手動で設定せずに必要な段落のタイプを指定することができます。これらの説明を次の表に示します。
注意: 既定の設定を使用して段落を作成する場合、段落書式でテキストを囲む必要はありません。テキスト ブロック間に空白行 (Enter を 2 回押す) を挿入すると、古い段落が終了して新しい段落が開始したことを指定することになります。
次の例ではこれらの段落書式のいくつかを示します。
| 例:
段落書式の例 |
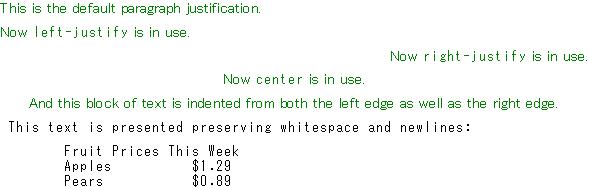 |
{paragraph color = "green", This is the default paragraph justification.}
{left-justify color = "green", Now {monospace left-justify} is in use. }
{right-justify color = "green", Now {monospace right-justify} is in use. }
{center color = "green", Now {monospace center} is in use.}
{blockquote color = "green", And this block of text is indented from both
            the left edge as well as the right edge.}
{pre
 This text is presented preserving whitespace and newlines:

        Fruit Prices This Week
        Apples          $1.29
        Pears           $0.89
}
| |
pre は、空白文字や改行文字を保持してソース ドキュメントの内容をそのまま表示する段落書式です。
pre では Curl® 言語式が評価されます。評価されないようにするには、次の逐語的文字列の内部に式を置きます。
|" および "|
次の例を見てください。Curl 言語式 (curl ブラケット内) は評価されていません。また、 pre では空白が保持されますが、空白行は保持されません。他のテキスト書式と同様に、pre 内の空白行は 1 つに折りたたまれます。
次の例では逐語的文字列を使用する場合としない場合の pre の使用が示されています。
| 例:
pre に逐語的文字列を使用した場合と使用しない場合 |
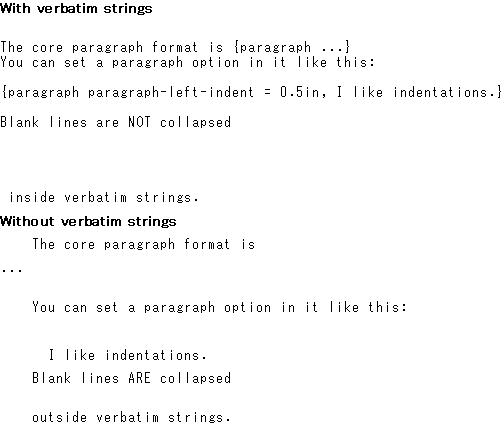 |
{paragraph
    {bold With verbatim strings}
}
{pre |"
The core paragraph format is {paragraph ...}
You can set a paragraph option in it like this:

{paragraph paragraph-left-indent = 0.5in, I like indentations.}

Blank lines are NOT collapsed


 inside verbatim strings."|}

{paragraph
    {bold Without verbatim strings}
}
{pre
    The core paragraph format is {paragraph ...}
    You can set a paragraph option in it like this:

    {paragraph paragraph-left-indent = 0.5in, I like indentations.}

    Blank lines ARE collapsed


    outside verbatim strings.    }
| |
heading は特別な段落書式で、同じドキュメント内の他の見出しのシーケンスを記録し、必要に応じて書式を設定します。
- 記録されるシーケンスは、段落を含むドキュメントで使用することができます。(使用されている Document に依存します。たとえば、TocDocument はこの情報を使用してページの左側にツリーノードを表示します。)
- 実行される書式設定は、段落内容のフォント サイズの設定だけです。
heading の構文を次に示します。
| 構文: | {heading level = number, content} |
| 説明: | - number は 1 から始まる任意の整数で、セクションのレベルを示します。
- content は見出しの内容です。
|
フォント サイズは次のように設定されます。
| 見出しレベル | フォント サイズ | 例 |
|---|
| 1 またはなし | 2em | 見出しはレベル 1 またはなし |
| 2 | 1.5em | 見出しレベル 2 |
| 3 | 1.3em | 見出しレベル 3 |
| 3 より大きい | 1.2em | 3 より大きい見出しレベル |
numbered-heading は、前のセクションで説明した
heading と構文や機能が似ています。
numbered-heading 書式は、見出しのテキストの前に番号が付き、見出しのセクション番号および構造レベルを示します。
numbered-heading の構文を次に示します。
| 構文: | {numbered-heading level = number, content} |
| 説明: | - number は 1 から始まる任意の整数で、セクションのレベルを示します。
- content は見出しの内容です。
|
次の例では numbered-heading を示しています。例が実行されるたびに新しいレベル 1 見出しが作成され、セクション番号が増えていきます。
| 例:
numbered-heading の例 |
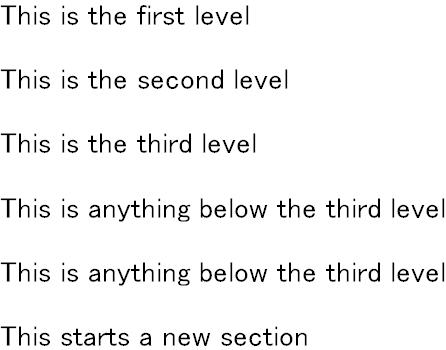 |
{numbered-heading level = 1, This is the first level}
{numbered-heading level = 2, This is the second level}
{numbered-heading level = 3, This is the third level}
{numbered-heading level = 4, This is anything below the third level}
{numbered-heading level = 5, This is anything below the third level}
{numbered-heading level = 1, This starts a new section}
| |
    {itemize [marker = marker value,]
            {item item's content}
            {item item's content}
        }
カンマで
item を区切りません。
marker オプションによって、各アイテムの前に配置するビジュアル オブジェクト (
マーカー と呼ばれる) を指定することができます。既定では、リストの各アイテムの前には
{bullet} 文字書式が適用されます。
marker オプションの値を任意の値に変えることができます。詳細および追加の例は
marker を参照してください。
多くの場合、行頭文字付きリストはその前にある段落に関連しています。関連する段落が特定の方法でインデントされていて、行頭文字付きリストが段落に対して適切にインデントされるようにするには、前の段落内に itemize ブロック全体を埋め込みます。
| 例:
行頭文字付きリストのインデント |
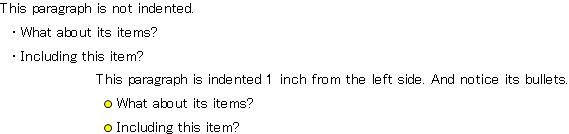 |
{paragraph
    This paragraph is not indented.
    {itemize
        {item What about its items?}
        {item Including this item?}
    }
}
{paragraph paragraph-left-indent = 1in,
    This paragraph is indented 1 inch from the left side.
    And notice its bullets.
    {itemize marker = {EllipseGraphic width = 2mm, height = 2mm},
        {item What about its items?}
        {item Including this item?}
    }
}
| |
行頭番号付きリストは、行頭文字付きリストと同様に指定します。
enumerate をコンテナ リストとして使用し、
item をこれに含めます。次の構文を使用します。
    {enumerate
            {item item's content}
            {item item's content}
        }
カンマで item を区切りません。リストの各アイテムの前には番号があります。リストの最初のアイテムには 1. の番号が付けられ、後続のアイテムの番号は 1 ずつ増えていきます。行頭番号付きリストが前の段落に対して適切にインデントされるようにするには、段落内に enumerate ブロックを埋め込みます。
| 例:
行頭番号付きリストのインデント |
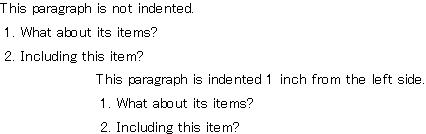 |
{paragraph
    This paragraph is not indented.
    {enumerate
        {item What about its items?}
        {item Including this item?}
    }
}
{paragraph paragraph-left-indent = 1in,
    This paragraph is indented 1 inch from the left side.
    {enumerate
        {item What about its items?}
        {item Including this item?}
    }
}
| |
定義リストは、一連の用語および定義をインデント表示します。次の構文を使います。
    {definition-list
            {term term-content}
            {definition definition-content}
            {term term-content}
            {definition definition-content}
            ...
        }
term および definition を区切るカンマはありません。定義リストの使用例を次に示します。フォントの色は明示的に設定されています。
| 例:
定義リスト |
 |
{definition-list
    color = "maroon",
    {term Character Format}
    {definition A text format that sets one or more text character
                properties such as the font size, font style, and so on.}
    {term Paragraph Format}
    {definition A text format that sets one or more paragraph properties
                such as paragraph indentation, spacing after a paragraph,
                and so on.}
}
| |
Copyright © 1998-2019 SCSK Corporation.
All rights reserved.
Curl, the Curl logo, Surge, and the Surge logo are trademarks of SCSK Corporation.
that are registered in the United States. Surge
Lab, the Surge Lab logo, and the Surge Lab Visual Layout Editor (VLE)
logo are trademarks of SCSK Corporation.